Tutorial: Automated Estimate Doc
Here's a detailed tutorial on how a general contractor in the construction industry can use Zapier to automate an estimate/bid for a potential client.
Today I’m going to give you a detailed tutorial on how a general contractor in
the construction industry can use Zapier to automate an estimate/bid for a
potential client.
She would meet with a potential client, ask some questions, and then
afterwards fill out a short form on her phone to automatically create an
estimate.
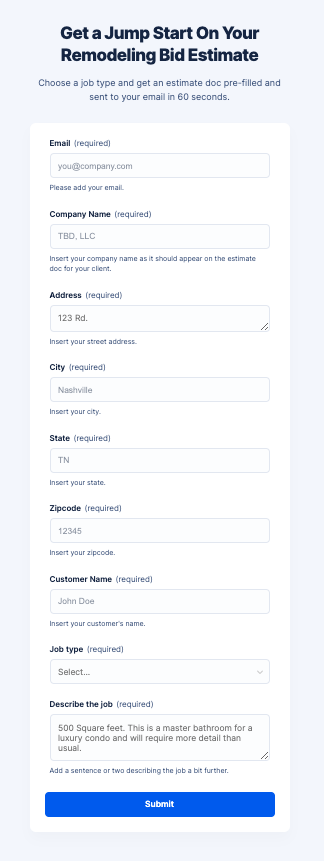
Here’s what the completed form looks like:
After submitting the form, the mystery of Zapier rains upon the workflow.
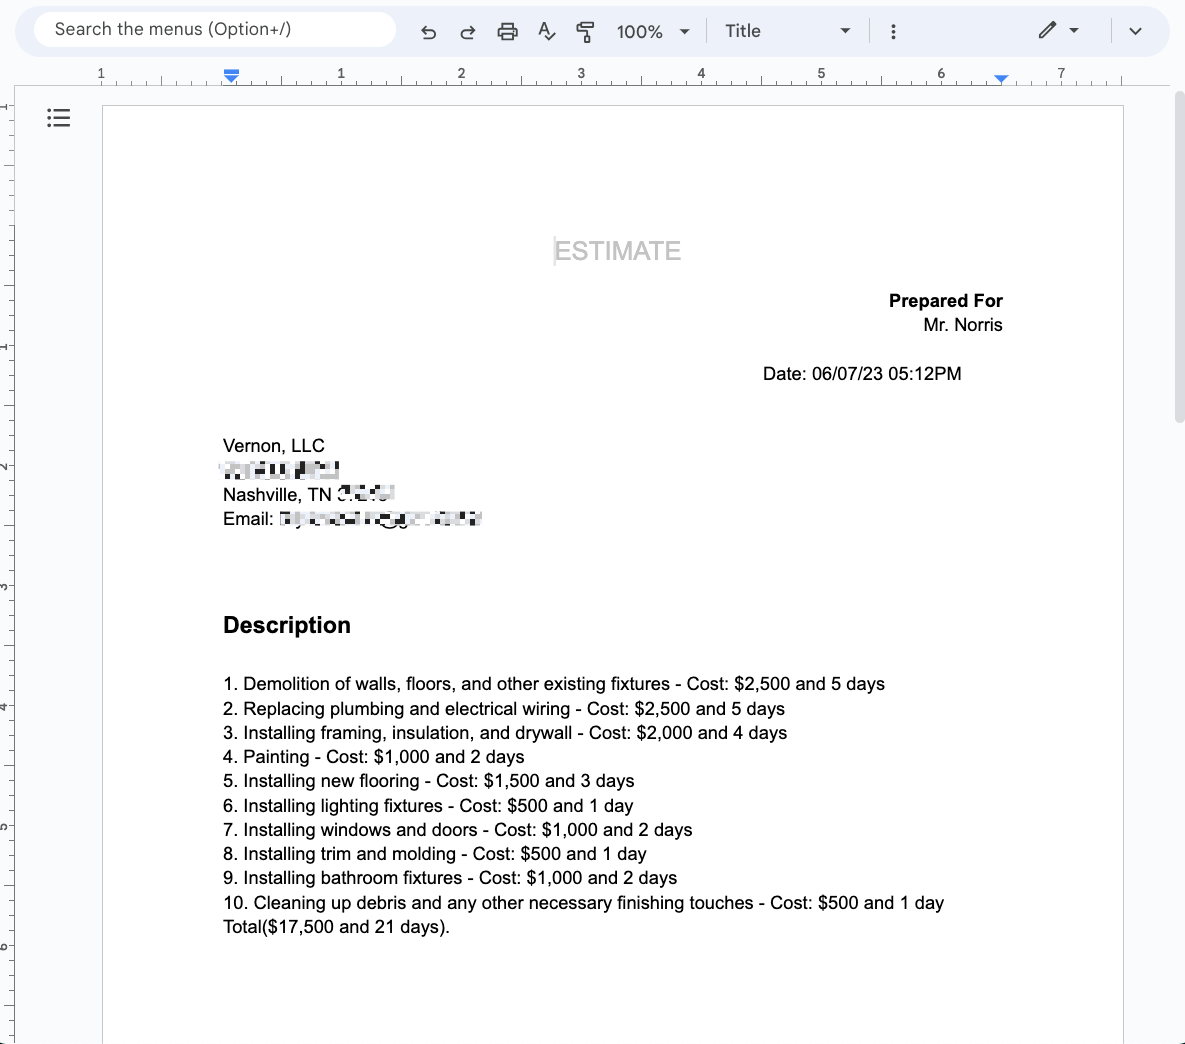
Then, voila! There’s an estimate doc all filled out with cost and duration
emailed straight to the general contractor:
So let’s dive in.
Creating the Form in Interfaces
There’s no better place to start with Zapier’s newest Interfaces than with a
basic form. So, that’s what you’ll do.
- Go to Interfaces
- Click “+ Create”
- Choose “Form”
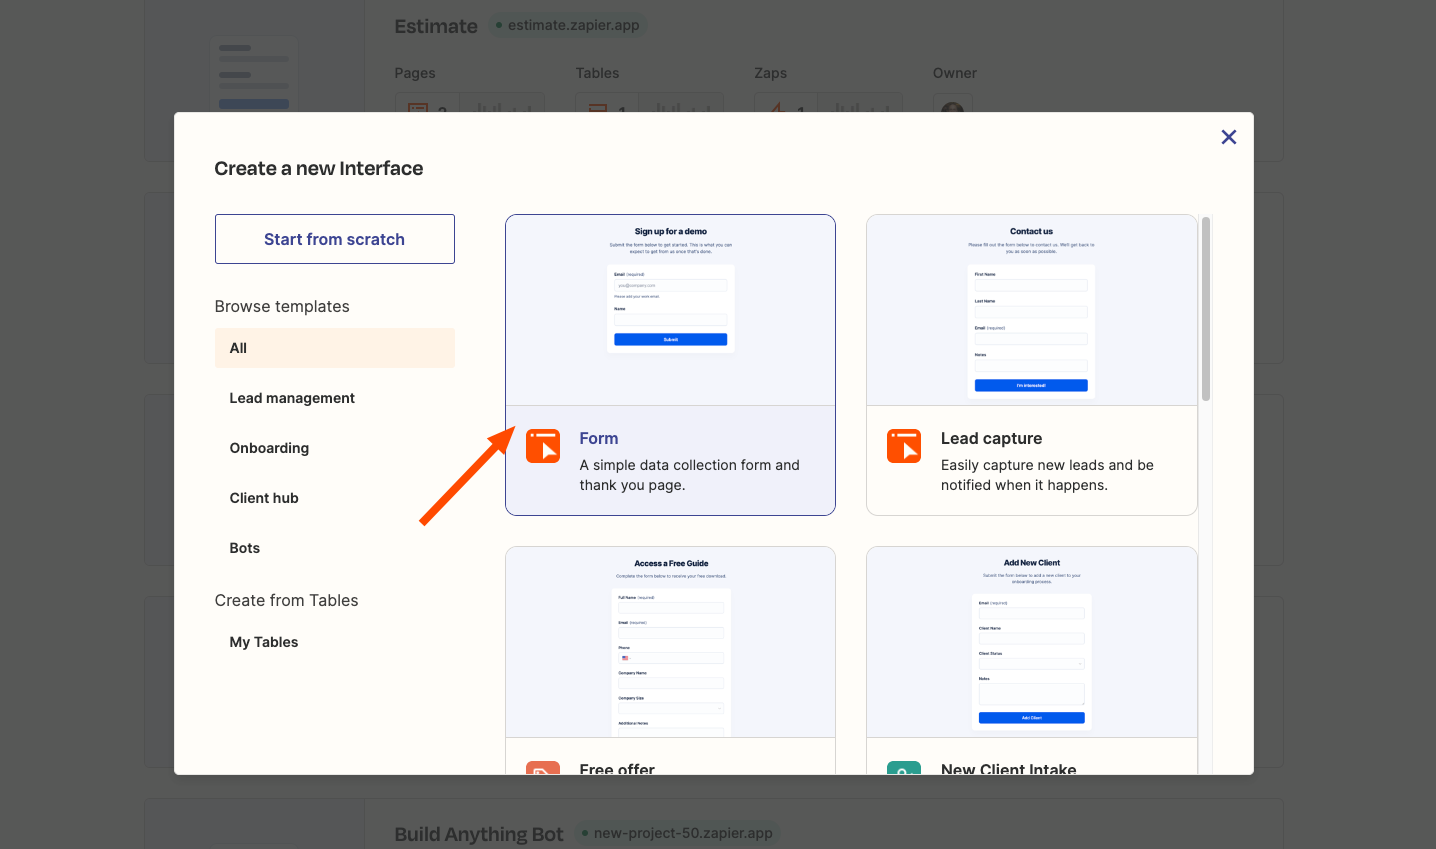
This creates a handy home for your Interface that will show you:
- Pages
- Tables (where data is stored)
- Zaps
At the start, you’ll just see pages. Click into the “Sign up” page and we’ll
get that sorted.
Adding Fields to the Form (and creating a Table)
Adding fields to a Zapier Interface Form is a piece of organic Whole Foods
Berry Chantilly Cake. But before you lay your teeth into the cake, you’ll
actually want to create a Table.
Zapier knew they couldn’t give you a form without a place to store the data.
That’s why they’ve created Tables. To create a new Table:
1. Click “Edit” on the form
2. Navigate to “Data” tab
3. Click ‘Create “Sign Up” Table’
Now, when you go to create new fields in the form, it will automatically
create them in the Table. For our general contractor example, I added the
following fields:
- Email (email)
- Company Name (short text)
- Address (short text)
- City (short text)
- State (short text)
- Zip Code (short text)
- Customer Name (short text)
- Job type (Dropdown list of different job types - you can add whatever you’d like here)
- Describe the job (long text)
Include a field for anything you might want to either use in a Zap or populate
in the Google Doc.
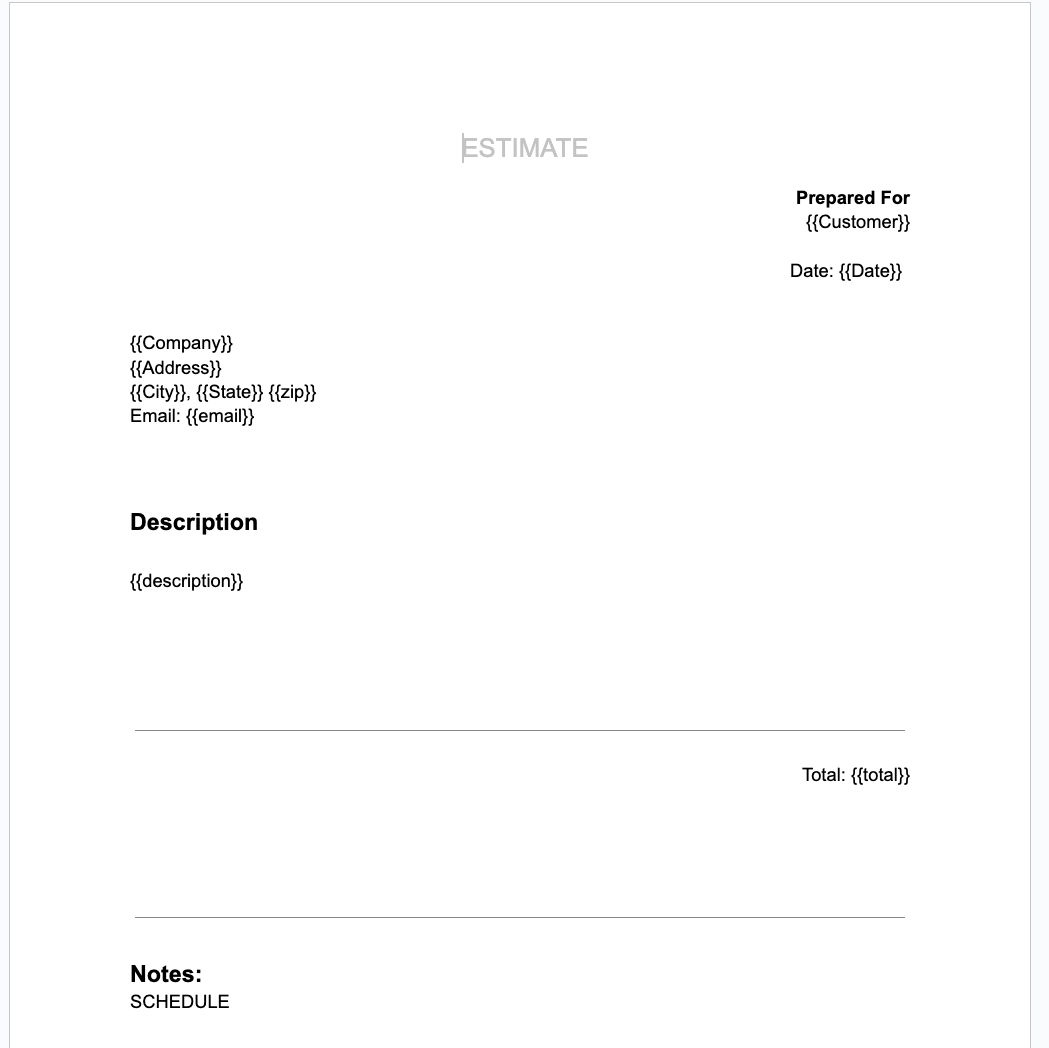
Create a Google Doc Template
Create a Google Doc with whatever you want to include. Any piece of the Google
Doc that you’ll want to replace with text from the submitted form you just
wrap in double curly brackets with no spaces.
Here’s what the estimate doc template looks like:
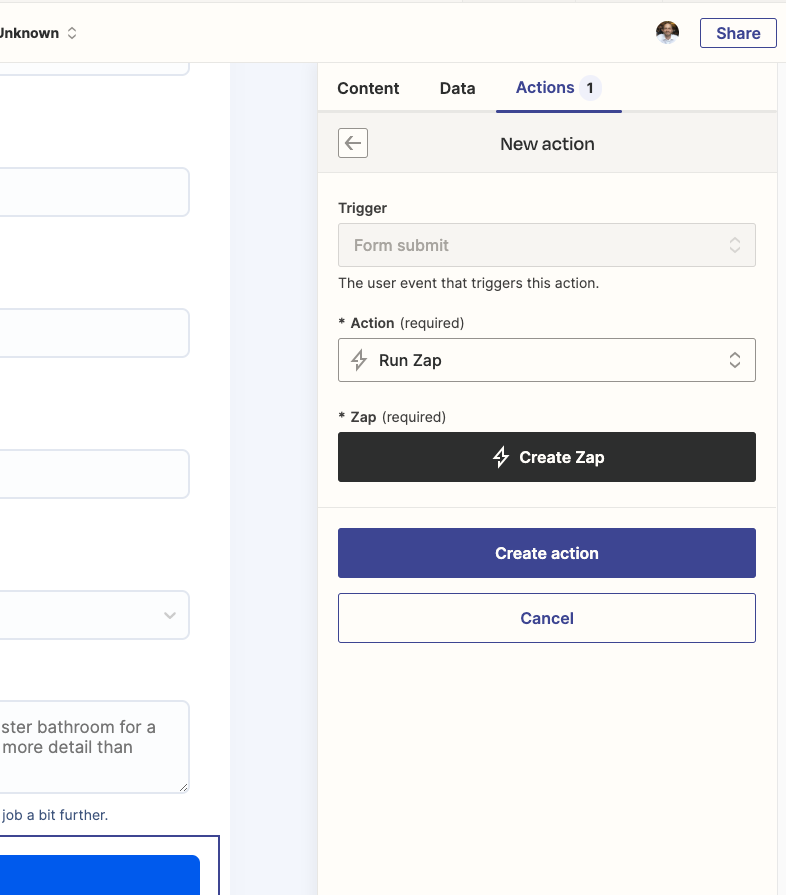
Zapier Mystery Revealed (create the Zap)
Back in your form with the edit side panel in view, click the “Actions” tab.
Then, click “Add action.” This is where you’ll get to create a Zap that
triggers when a new form is submitted. Click “Create Zap” and you’re in the
tried-and-true editor.
Grab yourself a test sample for the trigger and then create a new action in
the Zap using… drumroll… OpenAI of course. You can’t spell automation without
“A” and “I”.
The prompt isn’t anything wild. Here it is:
You are providing information that will be included as an estimate for a
general contractor to send to a potential client.
Provide a 10-step description and associated cost and schedule for a
remodeling estimate for a general contractor and add 50% to the total cost
(but don't show this 50% markup. Just bake it into all of the associated
costs).
Add up the total cost and days and output at the bottom in the following
format: Total(insert total cost and days here). So, If all costs were $10,000
and all the days added up to 21 days, it would look like this: Total($10,000
and 21 days).
Here are some notes about the job to consider when creating the estimate:
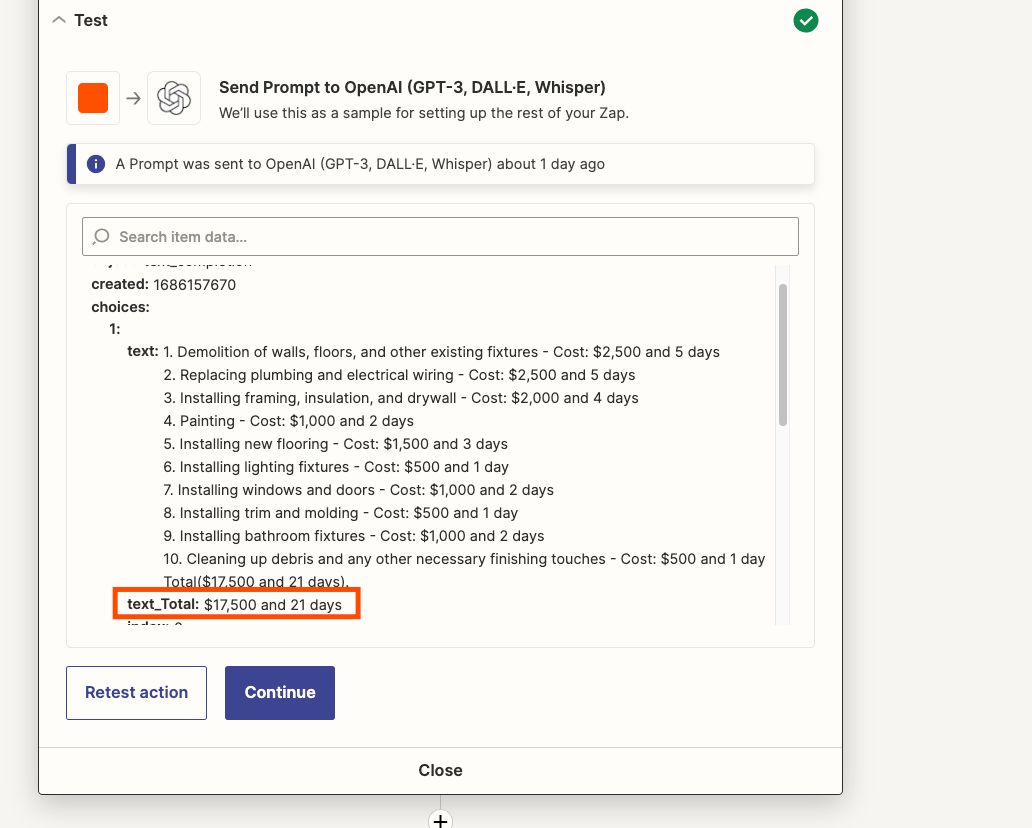
The reason why I have it output the total in the specific format using
name(value) is because this is a special way to tell Zapier to provide a
mappable field from this bit of text. It’s a bit of a Zapier secret. Here’s
how it outputs:
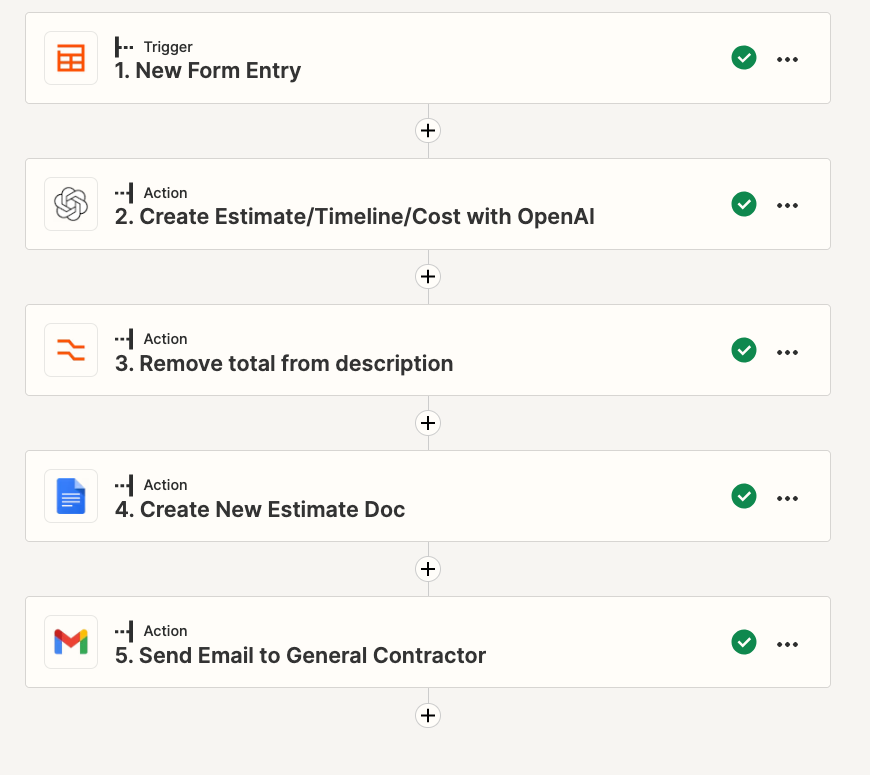
I throw in a Formatter step to remove the Total amount from the main
estimate text (don’t want it to show up twice in the estimate doc). Then,
we’re off to the next action step: Create a Google Doc from template.
Once you choose the Google Doc you had created, every text that was wrapped in
double brackets will show up as a field that you can map into.
Just map in the fields from the form, AI, and Formatter steps and you’ve got
your doc.
Add a send email step and have that doc sent to the email address used in the
form.
I could imagine reworking this for many other use cases. Here are a few
ideas:
- Project cost estimates for a freelancer
- Project plan proposals for a project manager
- Automated research reports with form embedded on your website
- Instant quotes for selling something
You’d have to think through the fields on the form, the prompt for AI, and
configure the Google Doc.
So to recap:
- Create the Interface (form)
- From the Interface, create the Table and Zap
- Use Open AI and a Google Doc template
That’s it for this week!
Happy Building,
Bryce
Let's Connect

Learn to build with Zapier
Subscribe to the Build Anything Newsletter.
