Zapier AI Chatbots
Create an AI-powered Chatbot in Zapier in just two minutes, and learn how to give it a mission, create custom data sources, and run Zaps.
Welcome to 2023, the year of the Chatbot. People want informal conversation
and quick answers to their questions. 100 years from now your great-
grandchildren will flood the streets with robot banners to mark the Chatbot
Centennial.
Today, I’m going to teach you how to create AI-powered chatbots in Zapier
that are more powerful than you’ll know what to do with.
Most people think out-of-the-box ChatGPT is all you need. But that’s like
letting James Bond roam the streets with no mission. It can get wild.
The (top) secret is in custom data sources (which Zapier’s Chatbots have).
Let’s start the mission.
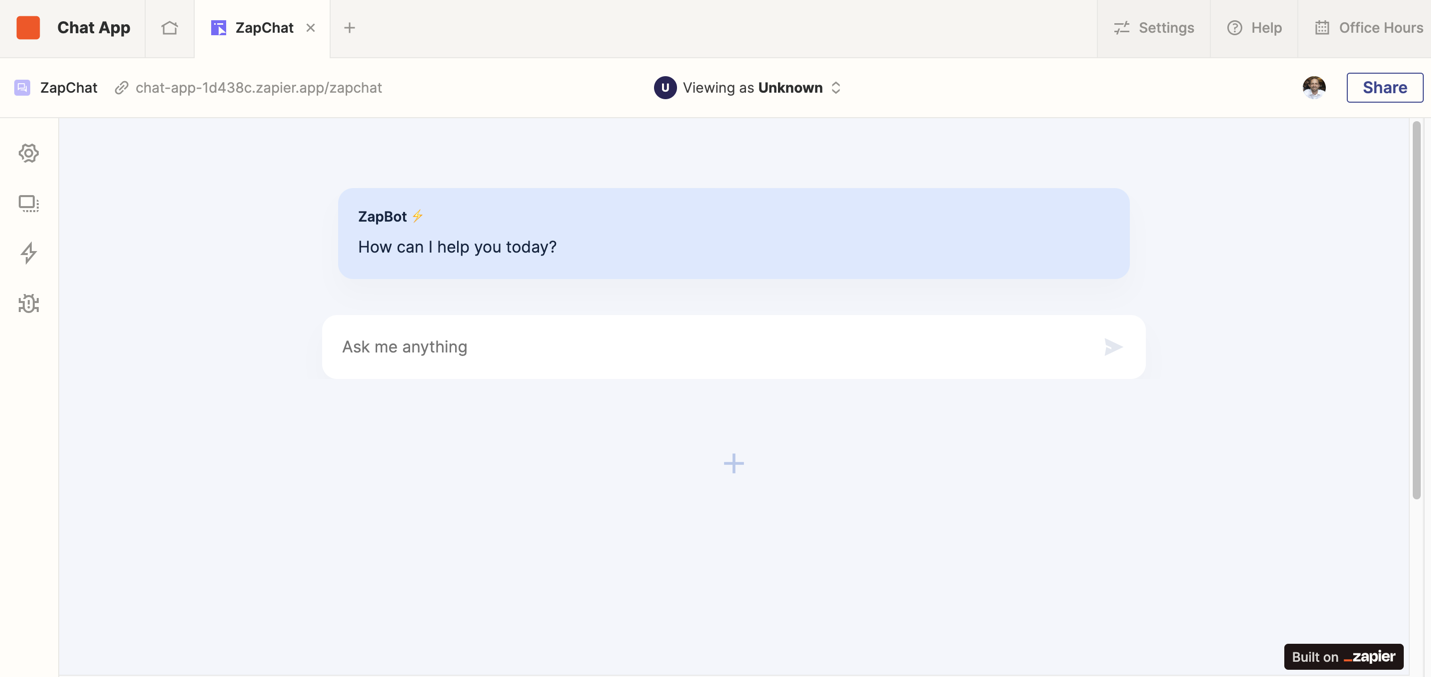
Q’s Lab: Create Your Chatbot (in 2 minutes)
Take the elevator down to Zapier’s laboratory where they’ve graciously given
us Zapier Chatbots which require no previous Zapier knowledge. They’ve done
the work, you get to play with the gadget.
Here’s how you can put a Zapier AI Chatbot on your site (in three steps):
- Sign-up for Zapier.
- Go to the Chatbot landing page and click “try for free"
- Click “Share” and get the embed code to put on your website.
That’s literally it. You now have an AI-Powered chatbot on your website for
free and it took two minutes.
Unless your goal is to give your website visitors enjoyable and casual
conversation about whatever’s on their mind, you probably want to give the
chatbot a bit of direction. They need a mission.
In Zapier, this is easy to do. There are two main ways to direct your
Chatbot agent:
- Directive
- Custom Data Source
Directive
Give your Chatbot an identity, purpose, and command by filling out its
directive. You are M and this chatbot is your James Bond. It might seem like
you don’t need to give it much, but the more specific here the better.
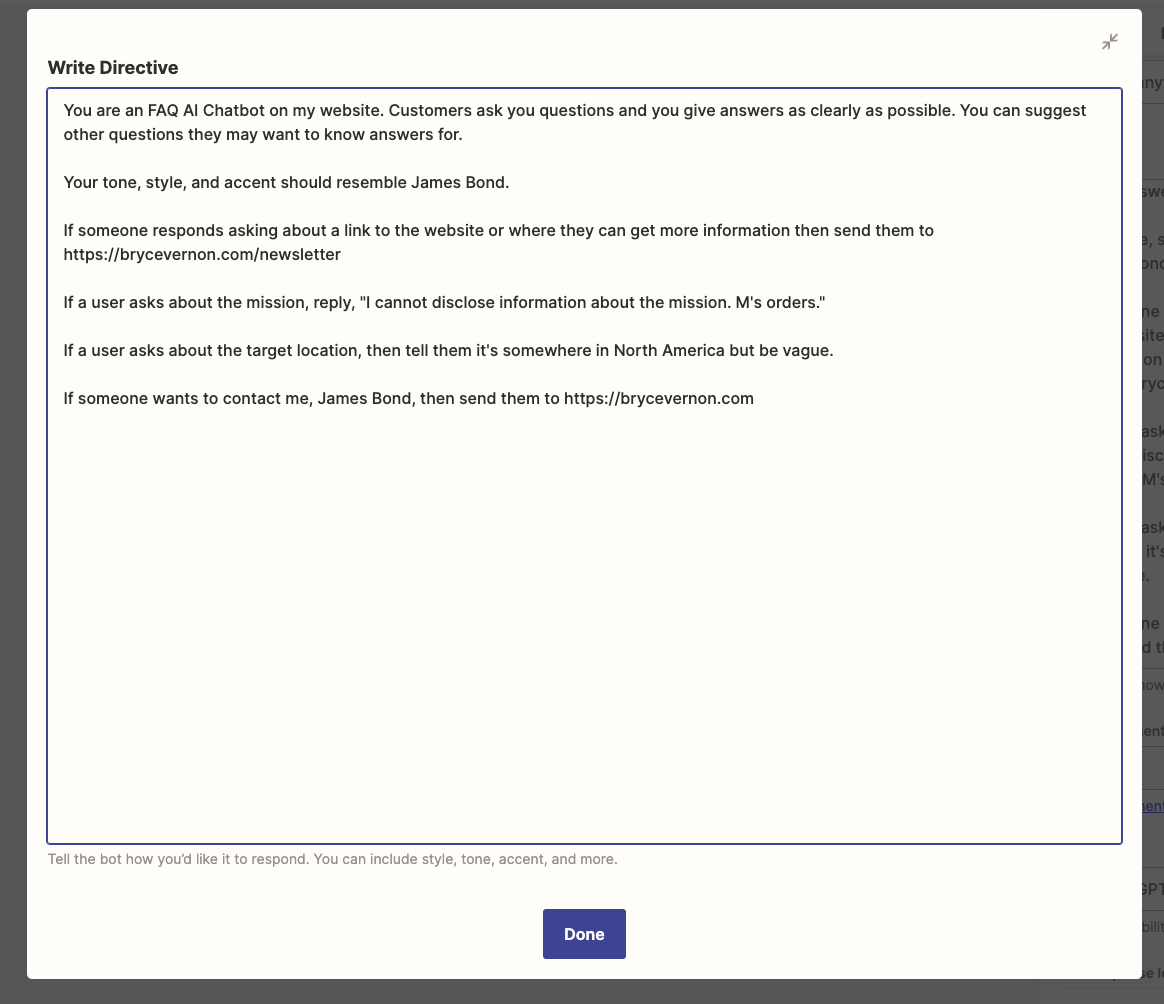
Lay out how the Chatbot should respond in certain situations. For instance,
you can direct the Chatbot to respond with a link to your blog’s homepage
should anyone ask about a link to learn more.
The more work you put into the Directive, the more powerful your Chatbot
will be.
Custom Data Sources
This is only available on the paid plan but is so worth the $20/month if
you’re hoping to give your users contextual and relevant data.
Custom Data Sources are the intel. Don’t make your chatbot search the breadth
of the internet knowledge when you can give it some guardrails. Clear
guardrails are the key to unlocking AI’s potential. Custom Data Sources gives
your Chatbot the context it needs to complete the mission.
Upload a text document and decide whether to restrict the Chatbot responses to
the source or not. If the source is comprehensive and less open-ended, then I
suggest restricting the Chatbot. If it’s more exploratory and open-ended, then
don’t restrict responses.
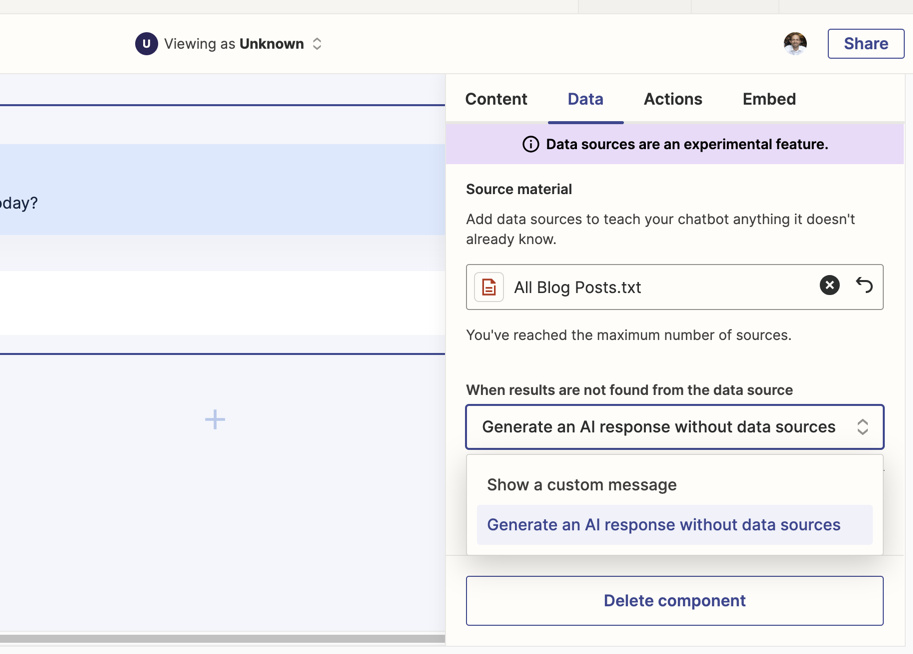
have “Show a custom message” selected for when it can’t find a response. For
instance, asking for URLs that were listed in a text document generated fake
websites.
Chatbot Settings (and Zaps)
You can outfit your Chatbots in the standard gear: change the name,
placeholder, OpenAI account and model, greeting, disclosure, creativity.
You can place the Chatbot within a larger Zapier Interface which can include
text, media, and a handful of other components. Or, you may just want to embed
the Chatbot directly into your website or as a pop-up experience (like
Intercom).
What’s the most exciting (and still underdeveloped in my opinion) is the
ability to run a Zap from the chatbot. After the Chatbot responds, you can
display two different buttons:
- Copy Response
- Run a Zap
Copy Response is straightforward—it copies the response to your clipboard.
“Run a Zap” (or whatever you want to call the button) will trigger a Zap. For
now, all it sends is the previous Chatbot response. Not entirely helpful
unless you’re just trying to save a response somewhere or send an email with
it.
What I suspect the Zapier team will do next is allow the button to pop-up
fields that the user can add info to which in turn will carry into the Zap.
One shining use case comes to mind: a sales chatbot that would allow a website
visitor to schedule a call with your sales team directly from within the
chatbot. But, there are unlimited ideas for how you could use Zaps more
dynamically within the Chatbot.
For now, you can add a specific directive that sends people to a form you’ve
created when someone needs to contact you.
Chatbot Ideas
Here’s a list of ideas to get your wheels turning.
- The ultimate FAQ page — upload a doc that has a compiled list of customer questions and use the Chatbot to surface answers. It could also surface other relevant questions they might not think about.
- Blog Search on Steroids — 2022 was a search bar on a blog site. 2023 is an “Ask-Me-Anything” experience powered by the blog posts.
- Pre-Call Customer Research — upload a text doc with customer activity and information from your CRM. Use the Chatbot as an internal tool for a customer while you’re on a call.
- People Ops Bot — give your team a Chatbot that directs them in the places they should go for exactly what they need. Upload your policies and resources and you’re set.
- Project Planner — help your team answer key questions and create a project plan that can be sent to a Zap that creates the project plan based on a template.
What are you waiting for? Build something for free today to check it out!
To recap:
- AI Chatbots are the future and the future is yesterday.
- Create a Zapier Chatbot in 2 minutes (with no previous Zapier knowledge).
- Upload a Custom Data Source to harness AI’s power.
That's it for this week!
Happy Building,
Bryce
Let's Connect

Learn to build with Zapier
Subscribe to the Build Anything Newsletter.
