Two features to power portals in Zapier
Learn how to use managed users and dynamic filtering in Zapier Interfaces to build apps
I pulled a staple out of my son’s finger this morning.
No, no I didn’t. My wife did. I was busy dancing around as if I was the one with the staple. I was trying not to pass out. My son’s doing great— it was a tiny staple, thankfully.
I don’t particularly enjoy thinking that anything exists underneath my skin. Given the choice, I would choose to be hollow. I would choose to be a log.
Bottom line: there are some things I want to see and some things I don’t (like a staple in a finger). It turns out, an app is all about seeing (or not seeing) things, too.
Today, I’m going to teach you the two things you need to build an app in Zapier Interfaces: managed users and dynamic filtering.
Let’s portal up.
What makes an app?
You want to build out a client portal once but be able to use it for all of your clients. So, to “build once and use twice” your portal needs to behave like an app.
You don’t want a document that you’ll have to duplicate each time you have a client. You want an app that flexes and filters depending on who is looking at it. You can start with this client portal template if you want to follow along today.
There are two Interfaces features that make Interfaces behave like an app:
- Managed users
- Dynamic filtering
Let's take a closer look.
Managed users in Zapier Interfaces
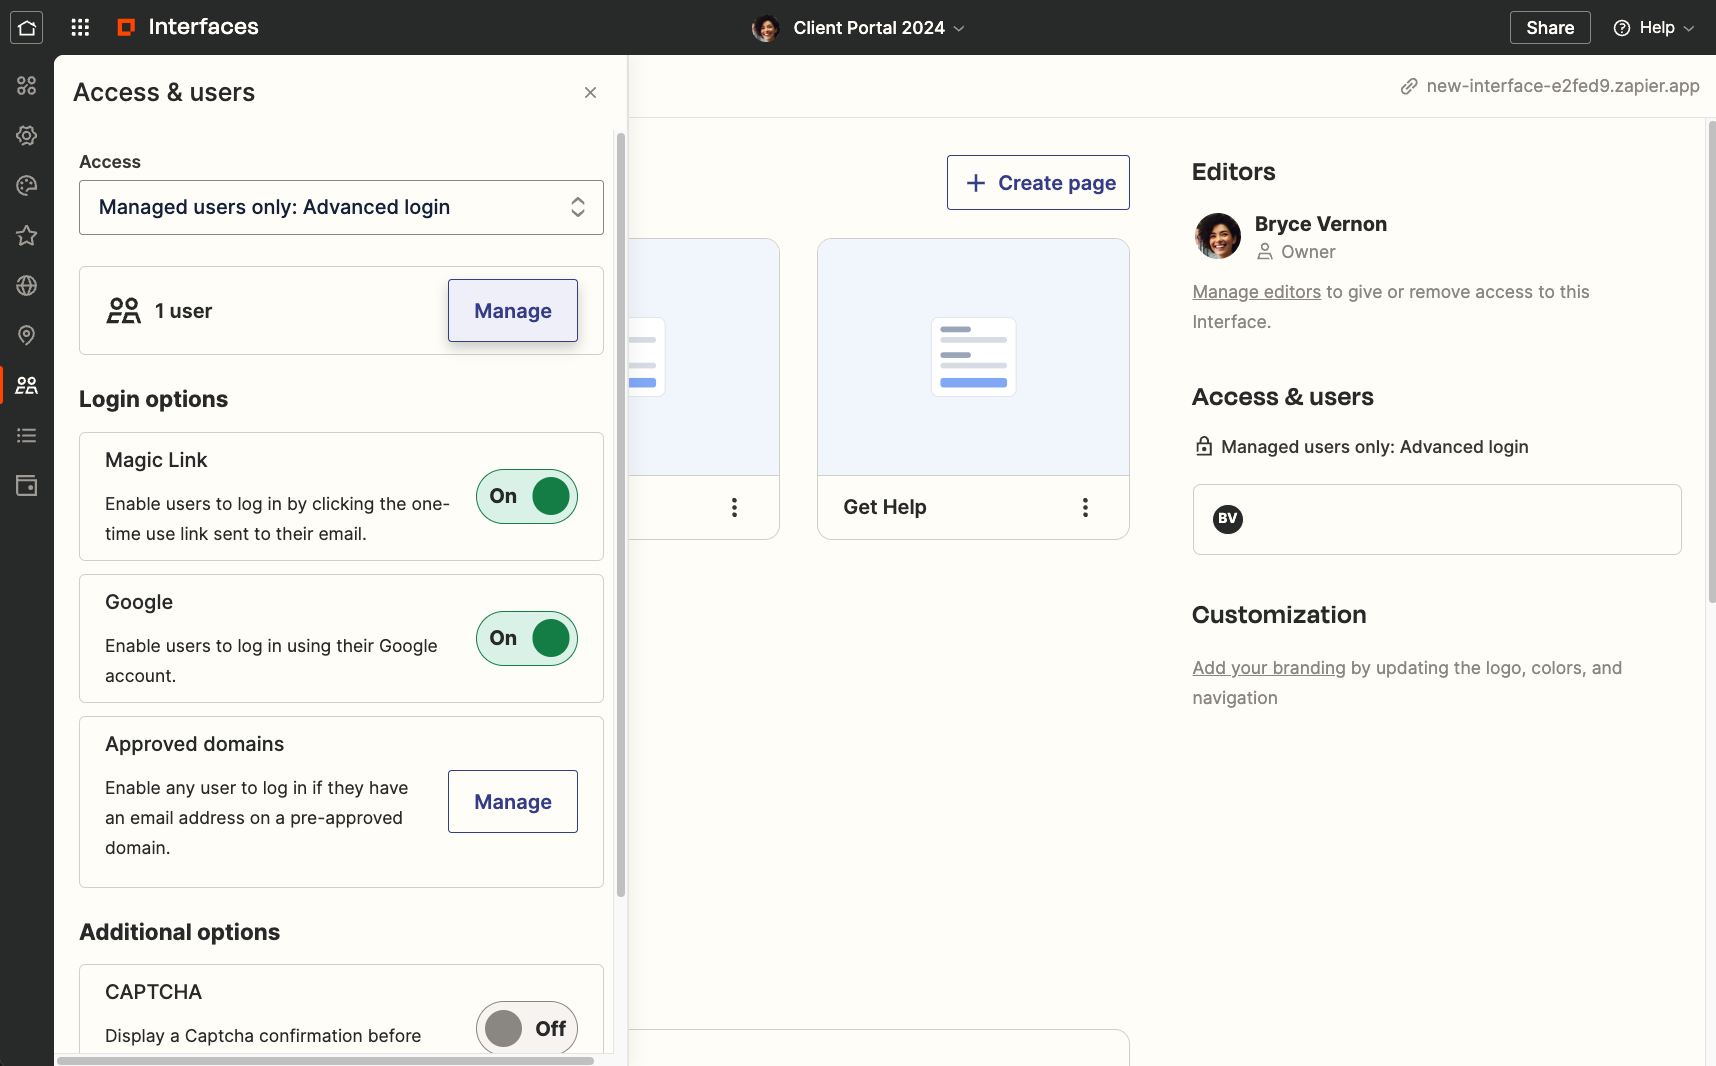
By default, Interfaces is publicly accessible. But for your client portal, you need to give it a lock. You want your clients to login using their email address. That way you can tell the app who is looking at it in order to only show client-specific content.
Go to your interface settings > access & users and choose “managed users only.” You’ll then be able to add the names and emails of your clients. Managing users can also be done with a Zap so that you can automate the adding and removing of clients as needed.
Dynamic filters with Zapier Tables and Interfaces
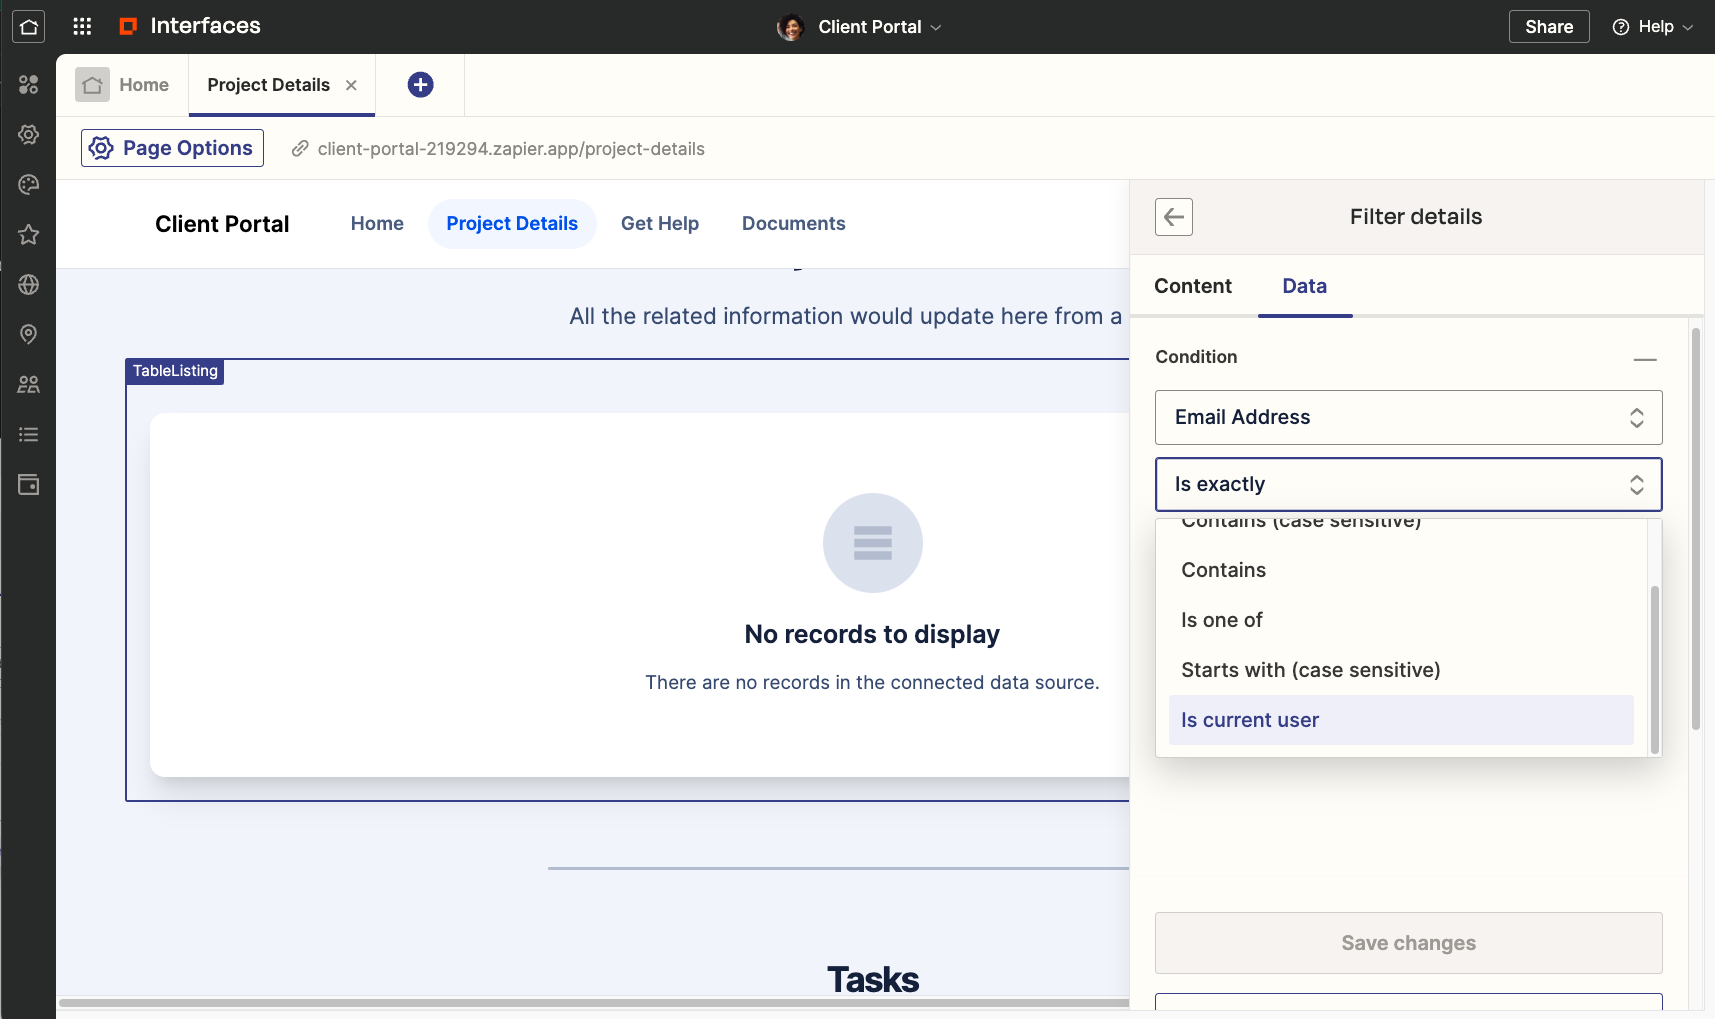
You’ll need two things to actually show client-specific information in your portal: a table and a table component in Interfaces. Zapier Tables will house all the project related data for your clients and then a table component will display it within your interface.
In your table, ensure there’s a field for the client’s email address since that’s what will tell the filter to look at. Then, add a data filter to only show content where the email address “is current user.”
That’s it!
When the client logs in, they’ll only see records from the table that pertain to them.
With both managed users and dynamic filtering, the app possibilities within Zapier explode.
To recap:
- Build your client portals like apps: build once, use multiple times
- Managed users and dynamic filtering allow to show and hide content based on the logged-in user
- Try this client portal template to get started
That’s all for this week!
Happy Building,
Bryce
Let's Connect

Learn to build with Zapier
Subscribe to the Build Anything Newsletter.
